Monday, December 28, 2009

Chinese Brush Stroke- Pandas

Students expand horizons by learning Chinese Brush work & Chinese Characters.
1. Begin by dipping Japanese watercolor paper and place on a dry paper towel.
2. Demonstrate chinese panda brush stroke.
3. Remember to emphasize less is more, students should learn to use the white space, students should not outline the shape of a panda but create the Panda with shapes.
4. Add Chinese Bamboo
5. Chinese Characters worksheet: Students should trace Chinese Characters.
6. Students should choose a Chinese word to use in the painting.
7. Practice Chinese Character
8. Paint the Character in to the Art work.
9. Allow ample drying time.
10. Place card stock under painting to dry.


Ancient Chinese Tea Paintings


Ancient Chinese Tea Paintings look very authentic and are fun for all ages.
The best method is to print Chinese coloring sheets.
1. Students use colored pencils to color the sheets as brightly as possible.
Red, Orange, Blue, Green and Yellow are colors that are typically used in Ancient Chinese Art.

2. Students crumble and smooth coloring sheets up to 10 times.

3. Paint the coloring sheet with coffee: The best tea stain is actually super strong brewed coffee.

4. Depending on time allowance- dry art work with a blow drier and add multiple coats of coffee. (It is important to completely dry art between coats of coffee.)

World Art and Culture Poster Board


This Project is a great way to get students interested in cultures across the globe.
Each week students are given a research/writing assignment
1. Demographics & Map
2. Holidays
3. Food
4. Language
5. Examples of Art from the Country
6. Create your own artwork using a technique from the chosen country-
or choose a medium to create a scene from chosen Country.
7. Students are to attach each homework assignment,pictures and art sample to board.
8. Boards are to be decorated to depict chosen country.

Drawing from Nature


Drawing from Nature:
This lesson is an intermediate drawing lesson and should follow basic drawing instruction.
The Instructor should choose a simple composition.
Step 1- Analyze the piece- Students should take 1 minute to review the composition.
Step 2- The Instructor should verbally walk the student through the unexpected shapes, sizes, and compare sizes of shapes.
Step 3-Students should use pencil technique to measure spacing, and overall size.
Step 4- Sketch large shapes in the composition
Step 5- Correct any mistakes in basic sketch
Step 6- Pencil down: Assess the basic sketch
Step 7- Build on sketch
Step 8- Stop step back assess the sketch- repeat 6-8 until complete.
Step 9- Use a softer lead pencil 4b or darker to darken up the line drawing.

Acrylic Paintings


Acrylics Lessons:
One of my favorite things to teach is miniature acrylics.

Step 1- Drawing exercises
Step 2- Learn to mix all colors on the color wheel with the primary colors.
Step 3- Mix shades of all colors in color wheel
Step 4- Mix a grey scale.
Step 5- Learning to tone down color using contrasting colors.
Step 6- Learn to paint washes
Step 7- Choose a scene-
At this step students are given a choice of reference photos that have a grid over the image and are scaled to the size of the canvas.
Step 8- Color chip color study: Students mix colors, paint chips then compare colors to reference photo.
Step 9- Miniature color study on paint chips-
students choose the most difficult sections of the reference to replicate on small chips.
Step 10- Begin Background wash
Step 11- Middle Ground
Step 12- Accents


Indian Rangoli Plates


Indian Rangoli Plates
These Plates are gorgeous and a creative way to learn about layering colors and color combinations.

Supplies:
Chinet Plates
Rangoli Coloring sheet or (Make your own design)

Step 1-
Paint 2-3 large color bands around plate- no white should show.
Start layering designs over colored bands.

Step 2- Use colored pencils to color in Rangoli worksheet, or draw your own with design using sharpies and color in with markers or colored pencils.

Final step:
Cut out design and glue to plate.


Bubble Paper Fun! Taj Mahal Project


Bubble Paper is a unique Art Project which can be very versatile.
In this case I have used the bubble paper technique to give a marbled look to the Taj Mahal Project.

Bubble Paper:
Fill small cup 1/4 water
Add a half teaspoon of paint
Place cup with solution into a deep pan.

Use a straw to blow bubbles blow quickly for large bubbles.
The bubbles will overflow into the pan make sure there are enough bubbles to cover an entire sheet of paper. Lightweight paper 20lb -regular copier paper works well) The paper can be blank or an image may be used: in this case I have used a Taj Mahal Coloring Sheet to bubble.

NOTE: Construction paper and heavy weight papers don't work well.

Allow Bubble paper to dry, once dry a variety of colors may be added or use as is, as I have done. Students cut out the Taj Mahal and glued the Image to construction paper.

In the example we have used glue and glitter to embellish the Art work.
Students also used glitter pens to accent.

Decorated Indian Elephant Pop Up Card


Students will have a blast learning about India with this fun Elephant project:
This project includes learning to write Hindi letters!

Students are given a worksheet of Hindi Letters which they can trace using tracing paper and markers. Once the Hindi Alpahbet is completed students choose 3-4 favorite characters and practice the characters for the project.

Choose a color of construction paper- then students are given an elephant coloring sheet to complete and cut out.

Each project will need 2 thick pieces of cardboard squares 1"x1" glued together.
The Colored Elephant can then be glued to the cardboard pieces.


While the glue dries, students can work on the background. I encourage students to choose markers that are harmonious colors that match the constuction paper that was chosen.
Hindi letters should be used as the background decorations.

Students can use contrasting colors sparingly so that the background doesn't compete with the Elephant Art.

Finally students should glue the elephant to the background.

Wednesday, December 23, 2009

Cinnamon Ornament Party!


Cinnamon Ornaments are very nostalgic and are a fun way to bring friends and family together.
I had an ornament party at my house for all the Little girls and ladies in my family, it was a good time to get together
The Recipe:


Make sure to have plenty of brushes and Acrylic paints.

Heart Wall Hanging

This project is wonderful for Valentines Day, Mothers Day, ect...


Start from scratch or pre make the hearts for students.
RECIPE:
Use a straw to holes on the right and left side of the hearts (these holes are to hang ornament.)


Paint back, of the ornaments then the front with acrylic paint.
Allow paint to dry or blow dry.
Add first layer of paint: Students should paint borders or strips of color.
Students can layer designs by painting dots, hearts or other shapes and patterns over borders.

Stick on gems or glitter glue can be used for snazzy accents.
Use ribbon string or yarn to hold hearts together.

Bird Illustration Project


This is the perfect winter or seasonal craft.
Students were given a variety of bird illustration ideas, and a list of matierials.
Students were to pick thier favorite illustrations and come up with 3-4 rough sketches of different compositions. Students then had a class analysis where students discussed what they like most about each composition and help fellow students choose a final composition.

Students also talked about what type of materials that they planned to use for the project.

This project is excellent for greeting cards.

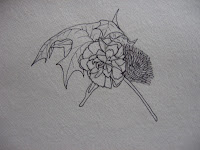
Crayon/ Pencil Leaf Rubbings & Prints

Crayon or pencil leaf rubbings are an excellent project for Fall, or to complement a science project. This project can be completed with children or Adults.
Children enjoy using crayons but colored pencils can be used for simply elegant leaf rubbings.

Students are to gather a variety of leaves.
I encourage students to start with large leaves and work down to smaller leaves.

Leaf rubbings make beautiful seasonal collages, which can be made into placemats, wrapping paper, or wall hangings,

To add some sparkle students can use glitter pens to add interest.


Leaf Prints are complement the LEAF RUBBING project.
Leaf prints are simple and lots of fun.

Gather a variety of leaves and dip leaves in paint then use leaves as if they were stamps.

Some additional effects:
dip leaves in gold or silver paints and use as stamps.

Clay Mosaic Ornaments


Clay Mosaics are a fun way to introduce students to mosics.

This project is goes along well with studies of Christmas traditions around the world.
I included a handout of Christmas traditions around the world.
Students were particularly interested in St Lucia Day.

Students watch a demo on how to kneed clay then roll clay out and cut with a cookie cutter.
To cut properly you must emphasize that the cutter be pushed down with force, as well as moved slightly from side to side.

Students then learn to Marbelize! The students loved mixing white clay with blue to make the World ocean. Students made blue & white marbelized balls then flattened them and adhered to cut clay design.

Continents were the next part of the lesson students used green clay to form the continents, which were placed on the blue marbelized ocean.

Nest students made tiny balls with yellow clay and highlighted the globe.
Students were give more colored clay to make and adhere mosaic pieces to thier design.

Finishing touches:
Students used the end of paint brushes to make small indentations. Students used glitter glue to fill the indentations to give the ornament a shimmery look.

African Art- African Animal Sillouette Paintings


This lesson teaches students to
1. Make color washes with complementary colors.
2. Draw silouettes
3. Create an interesting composition

Students watch a demo on washes, we talk about complimentary colors.
Students study pictures of african skies.
Students pick 2+ Complimentary Colors and begin washes on water color paper.

Part 2
Students sketch animal sillouettes.
Students make a 3-4 miniature composition sketches.

Students are guided as they choose a final composition.
Students do a rough draft of the final composition.

Students will complete the project by painting the final composition in black paint over the completed wash.

This lesson would compliment lessons on Africa, or African Animals